Sunday, November 29, 2009

Stempelglede Card Contest


This is the card I made for the "Stempelglede" blog card contest. I picked up the light blues, silver and ivory colors that were in the pictures that they gave us for color inspiration. I used the one and only stamp I have that Stempelglede makes. Her name is "Maribel" and I just love her. She stamps really well and she has such a striking face. I was going to put a title on the front of this card that said either "Snow Queen" or "Winter Dreams & Wishes Granted by Maribel" but then I decided against it. I used the same flowers on this card that I had used on that first card I started on and then forgot to leave room for the stamped image(see post a few back). However, this time I dyed the flowers so that they would match the whole blue color scheme I have going on. It's hard to see but I stitched around the inner area of the panel using silver thread, up close it looks really pretty. I used white and silver velvet leaves but I did also brush over them with some blue metallic ink and some Distress Ink in Vintage Photo. Up close the chipboard flourish at the top of the card has Crackle Picket Fence paint on it and then it has some blueish/green metallic ink brushed over the crackle paint. Then on top of that I tapped it with VersaMark ink and finished it off with some Ultra Thick Embossing Enamel. I used several different types of ribbon on this card. I used the velvet ribbon and the detailed trim ribbon on top of that for the bottom portion of the card. For the bows I used a white sheer ribbon with silver sides and I also used a silver metallic seam binding ribbon. I personally love seam binding to use for bows and such because it's just really easy to use and it lies flat when you need it to and so on. I also used a beaded silver ribbon to add to the middle of the bow. I realize that there's a lot going on with this card, but I wanted it to be that way. You can't really see them but I have these clear snowflakes on the card in and around the flowers and leaves. I added Maya Road pearl stick pins and also a crystal/bling flourish. There's a bit of silver Stickles glitter glue on the flourishes at the bottom of the stamped image.

I noticed when I was looking at all the different entries for this contest that all the woman in Holland, Finland, Germany and so on, they all have very intricately folded cards. So many of the cards I looked at opened up to be these very detailed folded cards. I would need a PHD just to learn how to fold them back up. They also focus on every detail of the card, they don't stop at just the front and back of the card. So many of the cards I looked at have these beautifully decorated insides as well. After looking at all of those I felt like I desperately was in need of a card lesson from these obviously very talented woman overseas.

Lastly, I wanted to mention that I had a really hard time getting a good picture of this card. I think because of all the iridescent pieces and embellishments, the glitter and bling, it gave off a glare when I was photographing it. So I compiled the pictures I thought turned out the best and I am going to try and do a slide show with those. I've never done a slide show before so who know if that will work, but I guess I will soon find out? I just want the people who are deciding on the winners of this contest to be able to see a good photo of the card and also to see the different angles of all the embellishments.





Saturday, November 28, 2009


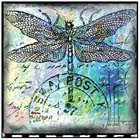
These are the images we are suppose to use for color inspiration for the Card Contest at http://Stempelglede.typepad.com

As I told you in the previous post, I got so carried away making the front of the first card I started on, I totally forget to leave room for the one Stempelglede stamp image I have that I need to use on the card for the contest. So I had to start all over. I decided to use all the same colors I started with on that card. I really like those light blues and I think those colors I've chosen are a good take on the colors in the images they show. The contest ends on December 6th if you are interested in participating. If not, like I said in the earlier post, if you get a chance check this blog out. The Design Team makes such beautiful cards. They are all so whimsical and very detailed and just so breathtaking.

Tuesday, November 24, 2009

This is a card I initially started making for a card contest on the "Stemelglede" blog. They are having a contest through Dec. 6th and the two requirements are you must use only their stamps, and the other is to use the images they have shown on the blog for color inspiration. I believe this company is out of Holland but I'm not completely certain on that.

At any rate, I stumbled upon their blog one day while I was blog hopping and I just fell in love with the work the Design Team does. It's all so pretty and whimsical and very shabby chic-ish. So, when I needed that type of inspiration I would go visit their blog. They have really cool stamps as well. I actually only own one of their stamps, but I love this particular stamp I bought, it's called "Maribel" and it's a really cool image of a woman. A lot of the other stamps they manufacture have a very "grunge" type look to them. So as I was saying, I started in on this card the other day and I got so into making the front of the card that I totally forgot about the stamped image I needed to put on the front. So this particular card turned out pretty I think, but it is NOT the card I will be entering into the contest.

If you get a chance go visit their blog. I think you will agree, they have some great inspiration over there. http://stempelglede.typepad.com
Quite awhile ago I stamped this Asian beauty on some transparency along with the fans and I then colored them in on the backside using Twinkling H2O's. The transparencies turned out really pretty that way. But then for some reason I set the three stamped images to the side and forgot about them. I didn't get back to making something with them until now. I have since attached the two fans to the main transparency and then attached that focal piece to some black cardstock.

Yesterday I finally finished making something with these transparency images. I attached some beautiful redish/pinkish cardstock to a cardboard piece that measures 7x9 and then I stamped some cherry blossoms on the red/pinkish cardstock. Then I stamped out a motivating sentence that I randomly came up with using the Asian style word stamps that I got from Club Scrap and then attached the focal transparency piece to it the larger cardboard piece. To finish it up I added some black German Dresden to the top and bottom of it, then on either side of the piece I ran some black Stickles glitter glue along the sides and then I added some paper flowers to the cherry blossom branches. Finally, I embellished the paper flowers with black Stickles glitter glue. By the way, I realize the main stamped image of the Asian woman is kind of hard to see. Try clicking on it if you want a better look.

I'm not really thrilled with the paper flowers that were added and how they turned out. But what's done is done. I actually initially tried making some cherry blossoms that stood out with some of Ranger's liquid pearls. However, they ended up looking really sloppy, so I needed to make these paper flowers to cover that mess up so you couldn't see it. Overall though, I'm happy with how it turned out.
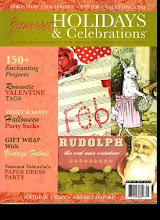
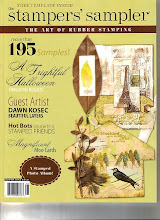
I had sent Stampers Sampler my original "Penelope" collage (see prior posts on it) that I made and then all the different pieces I made from that collage after I made different sized copies of it. When I received my newest issue of Stampers Sampler, I found out that they will be doing a challenge/call for artwork based on one of the pieces I sent to them using that particular collage. I had initially thought they could use everything I sent in for a masterboard article, but I guess they decided to do this instead, which is fine by me. It will be interesting to see what everyone comes up with based on the directions they have given for this challenge.

Saturday, November 21, 2009

RAK from TumbleFish

Take a look at the awesome original collage I won from the TumbleFish blog. I've been dying to own an original piece of Marsha's and now I do, yeah!! I actually won her RAK drawing. So in return for this one of a kind beautiful, beautiful artwork I received, I need to either do three random acts of kindness to three other individuals within a year, or I need to draw three names and send three different individuals some original artwork of mine as a RAK.


I'm just so excited to have this piece Marsha made. I've always had a hard time believing that she does cut and paste it all together because when you see it on-line it has such a polished, finished look, you kind of assume it's digital artwork. But now that I see it up close and personal I can verify that she does piece it all together herself and that in person it's even more amazing. If you've never been to Marsha's blog I highly recommend it. http://tumblefishstudio.blogspot.com/

Sunday, November 15, 2009

One quick little correction. These last three photos were not different angles to one piece I made as I had said in the previous post. It is two different frames that I made using that same collage in the frame. One of the frames has a transparency butterfly and the other has a stamped, embossed bird.

These three photos are the different angles to a piece I made using my "Penelope" collage. The best thing about making these collages I've been working on, is that you can copy them, reduce them and incorporate them into anything and everything you make. They go great in journals, you can cut them up into strips, I could even print them up as collage sheets and sell them. But I'm not up to that task yet. Marsha over at TumbleFish just finished making several collage sheets and it sounds like it takes a bit of time. But her work is so awesome, I think it will be well worth it because everyone is going to want to buy them.
At any rate, I've made about four of these colored collages now with an image of a woman in the middle and I'm currently working on three more. They are all different colors and the one I'm currently working on is the cream colors, ivory and whites. Then after that I will be doing one with kind of a red, white and blue color theme, and finally I will be doing one that has all different colors of orange.
But I liked how this frame turned out. This is a reduced version of the collage inside the frame. I believe my friend Laura Haviland over at creativewhispers7.com has one of these that I made for her?


Saturday, November 14, 2009


This is a Marie Antoinette collage I put together for the AlphaStamps site. AlphaStamps is having their 5th Anniversary and along with that they are having a contest called "Let Them East Cake." Back in the Spring of this year when everyone was in "Marie Antoinette Mode"
I never did end up making anything using one of her images. Not because I didn't like her or anything, I just never got around to it. Plus I'm not big on trends so I was kind of waiting for it to all die down. But let's face it, how could you not love this young queen who was such a rock star before there were rock stars. Or maybe she was the Britney Spears of her generation? Or possibly the Paris Hilton of the Versailles? Who knows, but she was young, beautiful and full of spunk and who doesn't love a girl like that?

Well finally, here is my first Marie piece. I painted the chipboard birdcage with a metallic pink paint and then on portions of the birdcage I attached some glitter. I just love how the birdcage turned out. If your looking for a birdcage like this, you can find them on the AlphaStamps website. The french document that the collage was done on is an authentic document I got from VintageCharmings.com and I believe it is dated 1870. I think it's the prettiest document just by itself, so I knew it would be perfect to do the collage on. And I love the way the roses and flowers look against Marie, the document and also the birdcage. I'm debating on whether I should add some satin pink ribbon to the collage or not? It just seems like it needs a little something else. What do you think?


Thursday, November 12, 2009

Biggest Cactus in Arizona

For those of you who are not that familiar with the desert or how big cactus's can get here, this is a picture of my step-father Ray standing by the biggest Saguaro cactus that we know of in Arizona. Pretty big don't you think?

Sunday, November 8, 2009

ArtChix Blue Moo Crads


These are the first six Moo cards I made for the up and coming ArtChix swap. I'm not sure or not if I'll be making six more. I've hit a bit of a slump and I'm not sure what direction to go?

I am however very happy to announce that I won the ArtChix Art Doll contest/swap. It was very unexpected and I was very excited. The ART Dolls are here on my blog back in one of the October posts. There were so many amazing entries I was really humbled by the win. That particular Yahoo group has an incredible amount of talented artists.
Tuesday, November 3, 2009

I want to clarify something I wrote about on my Halloween post from 10/31/09. A few people have commented on what I said and I think they got the wrong idea. I was apologizing for my backgrounds and telling you all how bad they were and that I wish I was better with them. I was not referring to the backgrounds on my art pieces, I'm referring to the background behind the pieces I have scanned.
I probably should put either a white or black piece of cardstock behind each piece I scan, but I forget to do that. Especially on the pieces that aren't square in shape, it's hard to get the backgrounds just right on those. The square ones are easiest because I just crop out everything except all four sides of the art piece I have just scanned. As I had mentioned, my friend Trudi does awesome backgrounds, and so do a lot of you as well. Trudi can give the scanned art piece a framed background or put ribbons around all sides or just get the background all completely blacked out. But like I said I'm not great at it and it's something I need to work on. I probably need to buy photoshop or a similar program like that. Right now I'm using the free IrfanView.