Thursday, August 1, 2013
I cannot believe how long it's been since I last posted. Thank you to my followers who have stuck with me, I figured I would go to my blog and have zero followers.
I'm sure there are quite a few of us that have the new Tag Pads from Prima that go along with the Julie Nutting doll stamps.
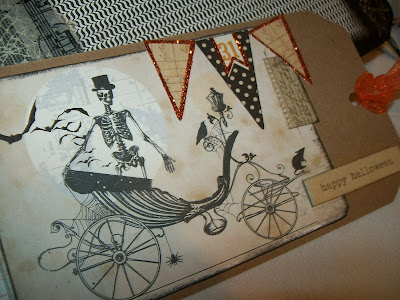
At any rate, they are so wonderful to stamp on, this paper the tags are made from picks up all the intricate details on my stamps, and they don't smear or anything. This tag I've shown here is a prime example of how great a stamped image is on these particular tags. These two stamps are from the wonderful PaperArtsy, who doesn't love PaperArtsy stamps?
I just colored them in with my Distress markers and it is now a book mark for my latest read.
I hope everyone is having a wonderful summer, the holidays are just around the corner, can you believe that? All my best to each and everyone of you.
Monday, November 12, 2012
Wednesday, November 7, 2012
Wednesday, October 31, 2012
Happy Halloween!!!
This is my final project for Kim over at ECLECTIC PAPERIE. I think it's quite fitting as the last project and it just happen to fall on "All Hallows' Eve".
For this project I used some really wonderful products from the ECLECTIC PAPERIE on-line store. I'm going to list my supplies so that anyone who wants to know what to order from ECLECTIC PAPERIE, you can rush on over and get those awesome products. I started with the G45 "Black Policy Envelope" spiral book. This is such an awesome book to play with and all the pockets that are in it that you can fill, it's really great.
I honestly can't believe it's only $6.49, most books like this one that are coming out anymore cost around $14.99.
I of course had to have the Charcoal and Orange twine from
THE TWINERY. Only $2.89 for each of those. I also used the
"Adornments-Regal" from the Tim Holtz Idea-ology line, that's where the metal wings came from. Also used was the Wendy Vecchi Studio 490 Art Parts "Pocket Watches". I love these!! For only $6.99 you get 3 sets. Since using them on this project I have since ordered two more, they are so much fun to add to basically any project.
One of the newer stamp sets from Stampers Anonymous/Tim Holtz is "Artful Silhouettes". There is so much more you can do with these stamps aside from just having the silhouettes in the middle of the frame. As you can see from my project, I used one of the women silhouettes and since it was a Halloween project I extended her nose and chin. I pesonally think it turned out great. On another Halloween project I recently made I used one of the men silhouettes and I gave him fangs. If you don't already have this stamp set, I encourage you to get it. Not only is it fun but as I said there's so, so much you can do with it.
The additional products I used for this book were: the Authentique "Enchanted" 6x6 Paper Pad (only $4.99 btw), Claudine Hellmuth Studio Paints in Orange and Charcoal Black, the Inkssentials Black & White Enamel Accents (on sale right now at ECLECTIC PAPERIE for $2.99) and the Inkssentials Surfaces #8 Kraft Tags.
There are also several additional photos of this Halloween book below this particular post, check them out as well.
I hope you like the project and I'd love to hear from you if you do and you have the time to leave a comment. I hope everyone has a wonderful and safe Halloween tonight. Don't forget to go over to http://eclecticpaperie.com to check out all the other new products she's gotten in recently, she has lots of great new items in. I spotted some new Basic Grey/Hero Arts stamps that I will have to get my hands on.
.....and thanks for stopping by.
Wednesday, October 17, 2012
New Eclectic Paperie Project
I made this fall tag in the post below from some of the awesome products Kim carries over at ECLECTIC PAPERIE, please take a look and let me know what you think. www.eclecticpaperie.com
I made the larger tag (Ranger Kraft Tags #8) very simple, and I created a little pocket on that tag to be able to hold the wooden tag set I also made. I did put a heavier bookboard tag behind the large tag so that it could hold the weight of the wooden tag set.
These wooden tags from Maya Road were a lot of fun to play with. I have not used them before and I highly recommend them. I painted them using the Claudine Hellmuth Studio Mini Acrylic Paints. The paints come in three sets of Urban, Contemporary and Metropolitan, I of course had to get all three. The size on these paints is great, they don't take up too much room and also the colors are so vibrant. Once the paint on these wooden tags was dry, I went over each of them with the Claudine Hellmuth Mini Gloss Medium.
I decorated the large tag and all of the smaller wooden tags using the 6x6 Simple Stories Harvest Lane pad. As you can see there were lots of little quotes and goodies to cut out of those papers for me to embellish these tags with. In the past I've personally always bought the 12x12 Simple Stories pads, but I now really like the 6x6 size. The little paper goodies you can cut from this size pad (and for which they are known)is a great size when doing smaller projects. They'd be great for ATCs as well.
I tied the wooden tags together using The Twinery twine in LemonDrop. The little pocket for the wooden tags was just something I made really quick with some cardstock and I gave it some color using Distress Inks in: Broken China, Peeled Paint, Scattered Straw and Spiced Marmalade.
My sister is hosting Thanksgiving this year and I've made her a little gift to bring over, I'm going to tie these wooden tags to the top of the boxed gift, I thought they'd be a perfect little embellishment for the gift.
That's about it, I hope you like it? Next week is my last week to make a project for Eclectic Paperie. It will obviously be a Halloween themed project. If you get a chance check out the products and great prices at:
www.eclecticpaperie.com
Tuesday, October 9, 2012
This is a fall tag I made for Kim over at ECLECTIC PAPERIE. It was a lot of fun to make and I plan on attaching it to a gift I've giving someone over Thansgiving.
ECLECTIC PAPERIE has some great products. For this tag I used: the Inkssentials #8 Tag in Manila, I used the Buttons Galore in Kiwi Fruit & Lemon Tart, I also used the Twinery in Honey Dew, Lemon Drop and Mandarin Orange (don't those names just sound like Fall?), also on the tag is a Maya Road Felt Pearl Posie in Cream. The paper used was a 6x6 pad by Simple Stories titled "Harvest Lane". Now I love, love, love Simple Stories paper and in the past I've always used the 12x12 paper from them, but after using this 6x6 pad, I think now I'll be using that size more often. The little quotes and paper embellishments that you can cut out of the Simple Stories paper (that they are known for) is better in the 6x6 pad because it's sized better for a tag or an ATC, and I tend to work in smaller areas.
I cut the background paper for the tag into strips and then I weaved them together. Once it was done I covered it in the Claudine Hellmuth Studio Multi-Medium Gloss so that it would stay together. I used the convenient .5 fl oz size of the Gloss Medium.
Happy Fall Days everyone!!!
Tuesday, October 2, 2012
Eclectic Paperie Goodies
I was fortunate enough to be asked to make a few items this month for Kim over at Eclectic Paperie. She recently took the business over from Daisy and now she's the new owner of this great little on-line shop. I get to make a few samples/projects for her this month and I'm so very, very excited about it.
This ATC is my first little sample/project. I have to admit, it's been awhile since I've made an ATC and I had a lot of fun doing it, I forgot how much fun they can be.
To make this ATC I used the following products from ECLECTIC PAPERIE:
1.) 6x6 Paper Pad from Echo Park "For the Record 2". I cut the little doilies out
to put around the inner border of the ATC.
2.) Ranger Inkssentials Natural Sticky Back Canvas ATC size.
3.) Claudine Hellmuth Studio Mini Acrylic Paint Sets in Urban, Contemporary & Metropolitan (I just had to get all three. They are wonderful! The size is great and the colors are so vibrant.) This is what I used to paint the background of the ATC on the sticky back canvas. I put a dab of each color on the ATC and then I used an old credit card to run it across the entire ATC.
4.) Claudine Hellmuth Studio Gesso in both the White and the Black. As you can see, I used these two Gesso colors to do the border around the ATC.
5.) Wendy Vecchi Studio 490 Stamp Set "A Form of Art". This is obviously the set I used to stamp the sentiment on the ATC.
6.) I just used a regular black felt tip pen to draw different sized dots on top of the painted colors on the ATC. Unfortunately some of that black felt tip pen of mine smudged a bit in a couple areas. Oh well, a couple mishaps always makes the project that much more interesting in my opinion.
I hope you like it? Be sure to check out ECLECTIC PAPERIE when you get a chance, it's well worth the visit. Lots of inspirational projects over there.
Saturday, September 8, 2012
This is the fourth piece I have made using the new LYNNE PERRELLA stamps from PAPER ARTSY. There are actually seven new stamp sets now from Lynne that I have on order but have not yet received. As soon as they arrive you can bet I'll be playing with them. Check out PAPER ARTSY to see them if you haven't already. Hope you like this newest pieces I made.
Have a wondreful stress-free day!!
Wednesday, August 29, 2012
Here is another one of the pieces I made using the new and oh so wonderful LYNNE PERRELLA stamps from the equally as great PAPER ARTSY. On all of these I have stamped in black and then as I mentioned in the previous post, I embossed using Ranger's Ultra Thick Embossing Enamel.
I used Alcohol Inks to color in the embossed areas and I used colored pens to the other areas. The backgrounds are acrylic paints, Twinkling H20's, black and white rub-ons for added interest and some miscellaneous doodling with a black felt Sharpie pen. The flowers on this one were great fun to make. The actually flower stamp is from a Pink Paislee clear stamp set. But the fun was in using the new SILKS Acrylic Glaze paints from the same makers of the Twinkling H20's. I have to tell you that these paints are amazing!!!! Do yourself a favor and rush over to www.DreamingColor.com and buy some. They are more of a glaze than a traditional acrylic paint, so when you do layers of colors, all the colors shine through in a stunning way. I used a couple different blues and teals on the flowers and they turned out so well. Unfortunately, the pictures didn't completely pick up the depth in the colored flowers. The seeds in the middle of the flowers were made using Rangers black enamel accents.
Thanks so much for visiting my blog, I appreciate each and every visitor. If you have time and want to comment, I would love to hear from you. Take care one and all as we head into fall.
Subscribe to:
Posts (Atom)